
Father's Day Gift: How to Build A DIY Reclaimed Wood 6-Pack Holder
Although painting a rock different colors and then writing the word "Dad" on it is a pretty solid Father's Day Gift, it would be kind of a weird one to give now that you're an adult. But that doesn't mean you can't still make him something.
But what? What do most dads seem to like? Oh yeah, beer!
That's why we brought together our two greatest passions--woodworking and beer--to help you build the perfect Father's Day gift: A Reclaimed Wood 6-Pack Holder. It's a fun project for any skill level - although some of the tools we use make things go a bit faster, the entire project can also be built using hand tools.
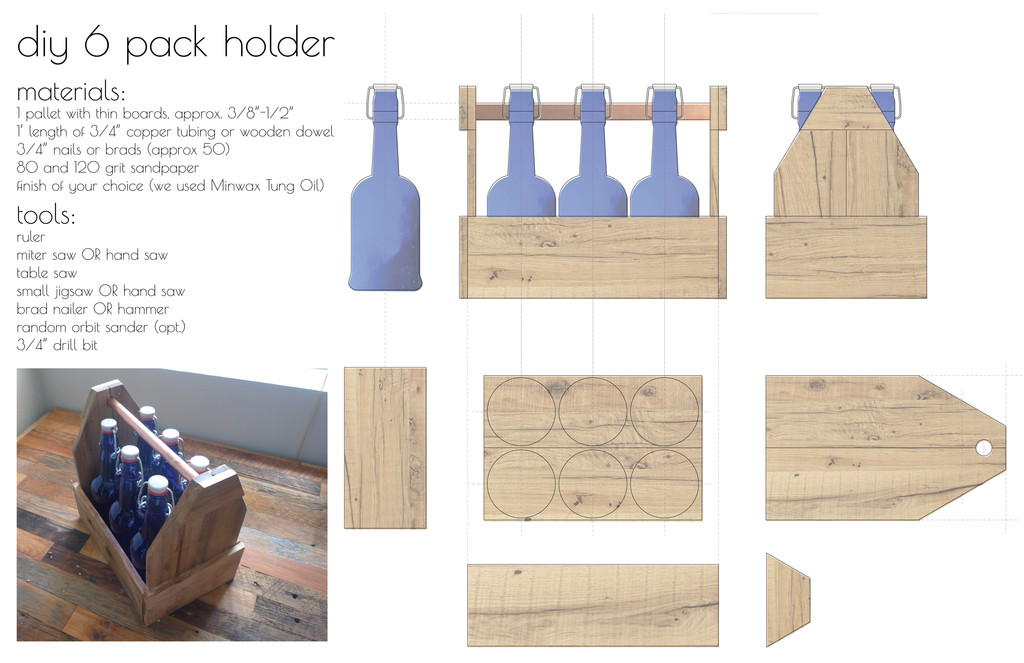
This post breaks down the process from sourcing the wood all the way through staining it (drinking beer not included). The high-level plans shown directly below will help you move through the 19 steps on this page. Good luck.
Step 1
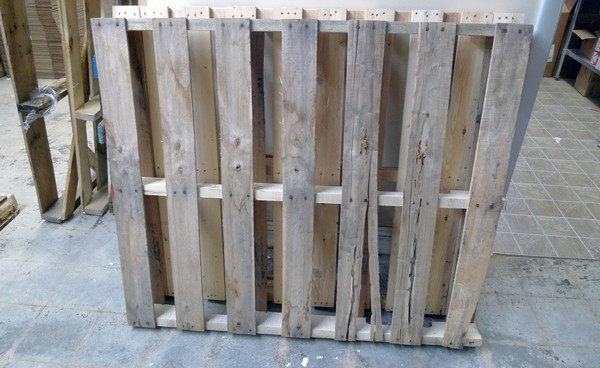
Finding a good pallet is important. Most pallets have quite a long lifecycle, being reused again and again, typically until they fall apart. I typically seek out pallets with thinner boards. In this case, I was able to find a red oak pallet with ⅜” thick boards, which is fun to work with and looks great with just a little effort. Many pallets are treated with chemicals to prevent rot and extend pallet life--it’s wise to avoid using treated pallets, especially when they might come in contact with your beer. You can find more about which pallets are safe here.
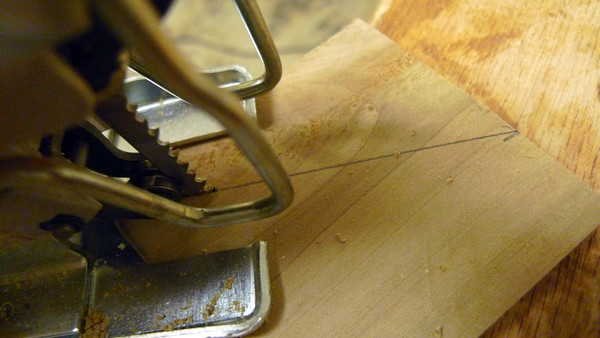
Step 2
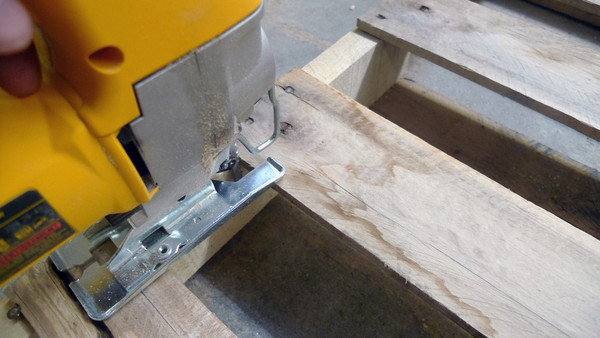
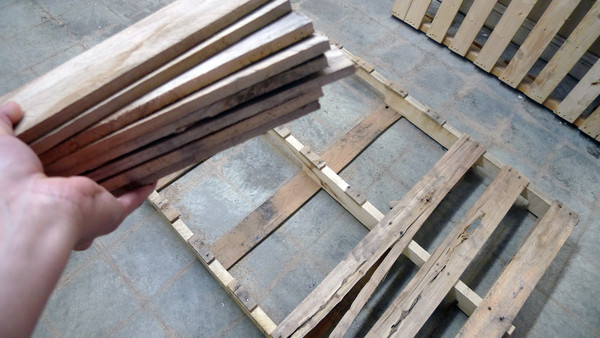
Disassembling the pallet. Because the boards we’ll be using for this 6-pack holder are all fairly short, disassembling the pallet is pretty straightforward. You can use a variety of tools to cut along either side of the pallet’s main supports, but I used a jigsaw to make these cuts.
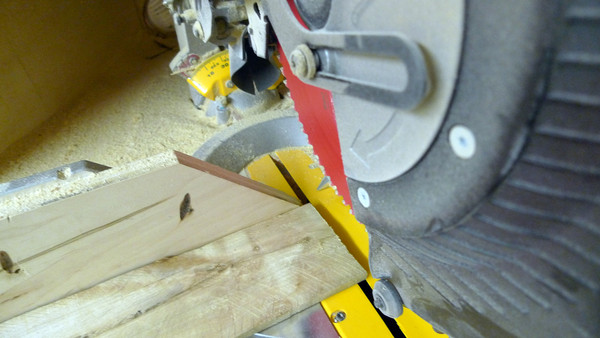
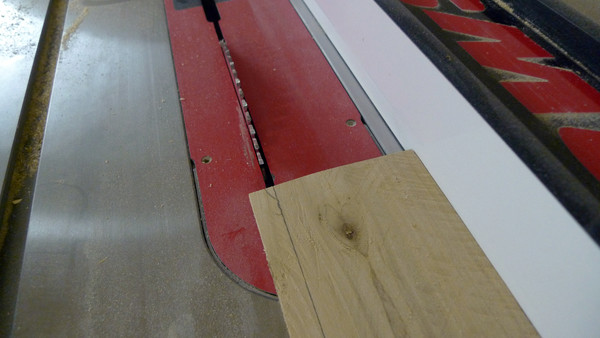
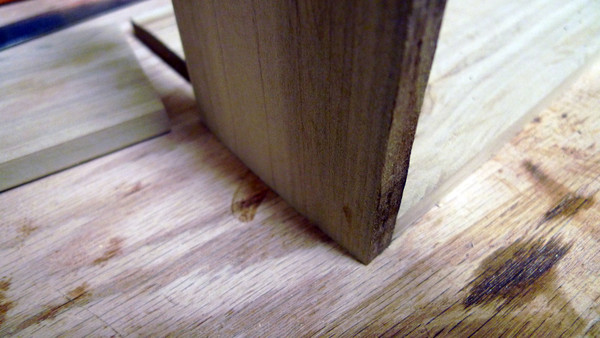
Step 3
Squaring the edges. If you have a miter saw, this step will go very quickly. Position your boards against a fence and make your cuts, taking care to avoid any nails. If you’re working with hand tools, simply use a square (or any other right-angled surface) to mark a straight line across each board at either end. Slowly cut each end to square both ends of each piece.
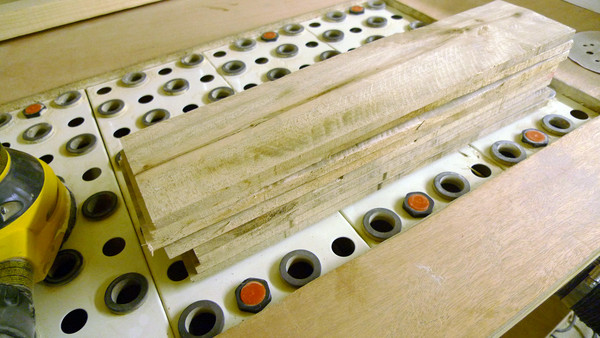
Step 4
Sanding the boards. Each pallet is different, and the pieces of wood you’re working with will have their own look and feel. For some folks, a rough, rustic surface is the look they’re striving for. For others, a more refined, crisp look will do best. I tend to like a more rustic feel, so I briefly sand both sides of each board to remove any dirt, paint or grime. At this point, take note of which boards are more severely warped than others. If a board is significantly damaged, it may be best to set it aside, but for the most part, we’ll try and use the warped boards where they won’t show quite as much.
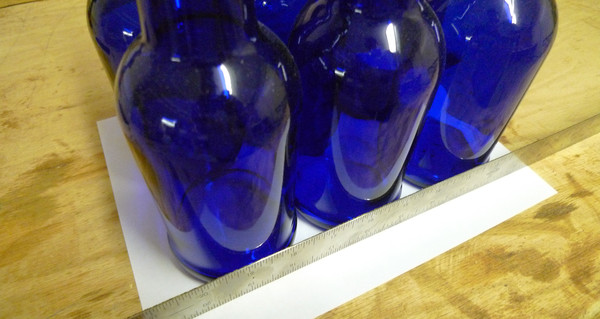
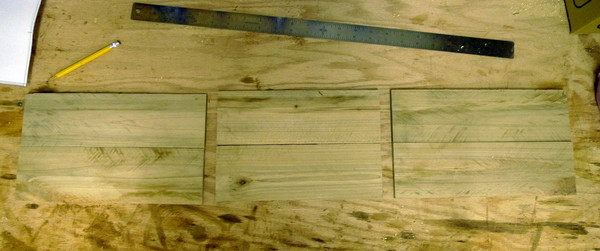
Step 5
Determining your bottle size. Making a universal 6-pack holder can be tough because as any beer drinker knows, there are many types of bottles to be found. Longnecks like Budweiser (but really, why are you making a 6-pack holder to hold your Bud?) are wildly different in height and diameter than, say, a bottle of Red Stripe. Generally speaking, it’s best to err on the side of caution and make the holder larger than you think you’ll need. Since I’m using this caddy to hold homebrew, I’m using the cobalt blue bottles you’ll find in all our kits. They each hold 16 oz., so they’re most likely a bit larger than what you’ll use. To find out how large to make your base, make a quick template by either laying out 6 bottles, or by measuring the cardboard six-pack holder your beer came in. Now, measure out an additional ⅛” on all sides to allow for a small amount of wiggle room for the bottles.
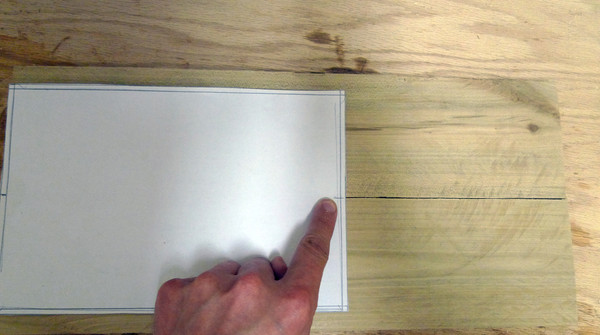
Step 6
Fold the piece of paper or cardboard in half and position 2 pieces of your pallet underneath. Using your template, mark the width and length of each piece and, using a table saw or hand saw, cut each one to the proper width and length.
Step 7
Maintaining the same width setting, trim 4 additional boards to the proper width. These will make your end pieces. Cut each of these 4 pieces to a height equal to the height of your bottles.
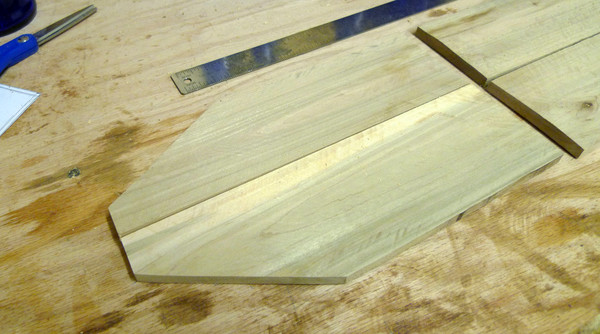
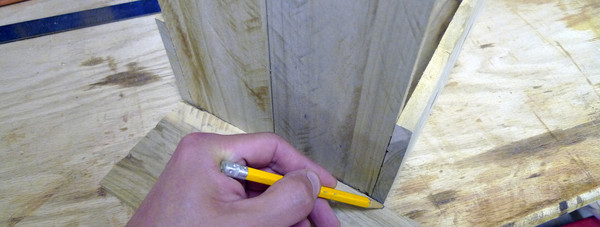
Step 8
Put 2 pairs of 2 pieces each side by side. Measure out 1” on either side from the center, and 4” down from the top. Draw a line to connect these two points - this will create the taper on the top of your 6-pack holder. Using a jigsaw, hand saw, or miter saw, cut along this line and sand smooth.
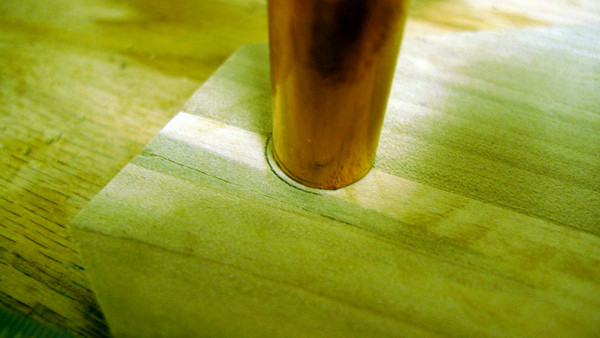
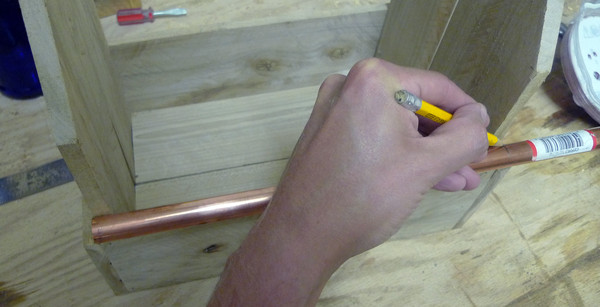
Step 9
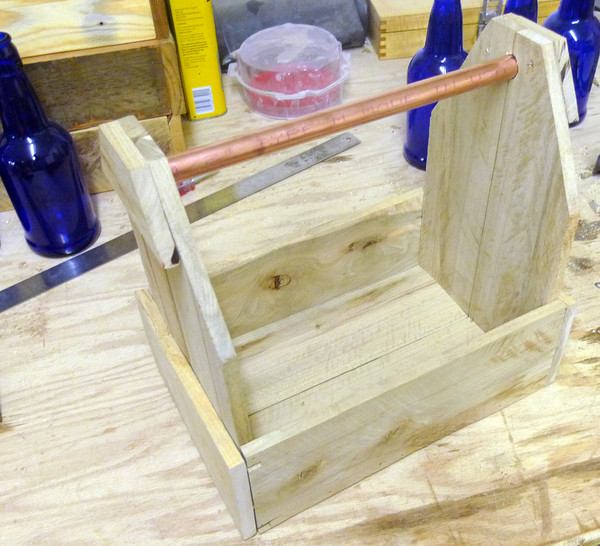
Measure down 1” from the top of your tapered ends. Place a dowel or copper tube on this mark and trace around its circumference. Find a drill bit which matches the size of your tube - in our case, we used a ¾” copper pipe and used a ¾” drill bit to make the hole. This will become the handle for the 6-pack holder.
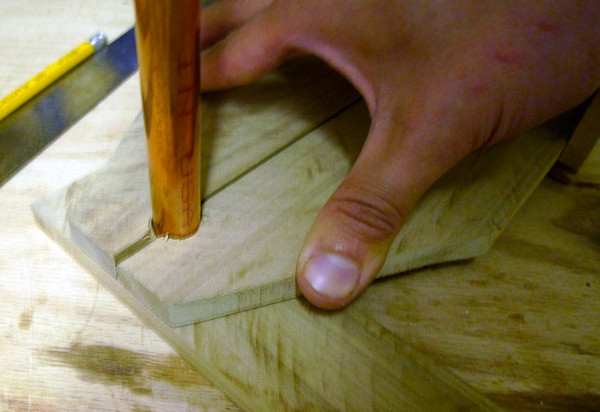
Step 10
Carefully pressing the two halves of the ends together, drill a hole for the tube using a drill press or hand drill.

Step 11
Cut a 1 ½” wide strip from a piece of scrap wood. Using the tapered ends as a guide, trace the angles of the taper and, using a hand saw, carefully cut two trapezoid-shaped pieces. Once secured, these small blocks will hold the handle in place (in step 16).

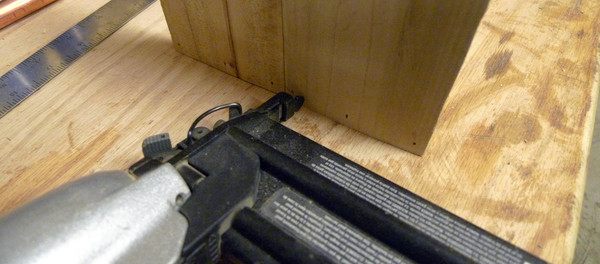
Step 12
Assembly. We used a small brad gun with ¾” nails to assemble our 6-pack holder. If you don’t have access to one, don’t worry--simply follow the same steps with a hammer and a pack of ¾” framing nails. Depending on how fragile the wood you’re using is, you may want to pre-drill small pilot holes to prevent splitting. Carefully nail the tapered ends to the base.
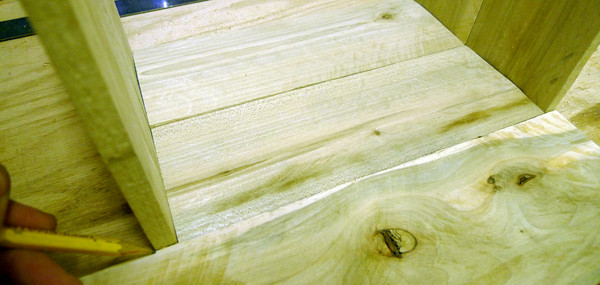
Step 13
Using the assembled pieces as a guide, carefully measure the length of each side and cut to length using a miter saw or hand saw. Lay the assembly on its side and nail the side pieces in place. Our particular pallet had slats about 4” wide, which was tall enough to hold our bottles in place. If you have a pallet with more narrow pieces, you may need to use multiple slats for this step.

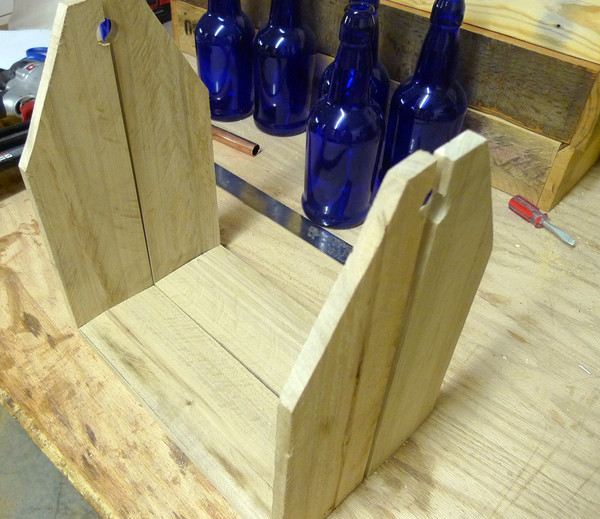
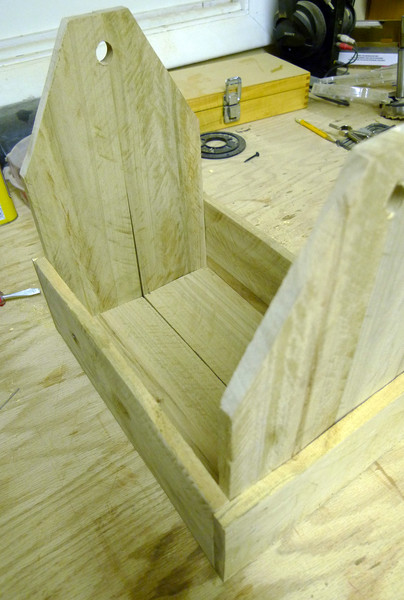
Step 14
At this point, you will have two halves to your 6-pack holder. It’s time to join them together. Placing the two halves together, measure the length of the end pieces and cut to length. Nail the pieces in place, taking care to make sure the two halves are as flush as possible and that the holes for the handle are aligned.
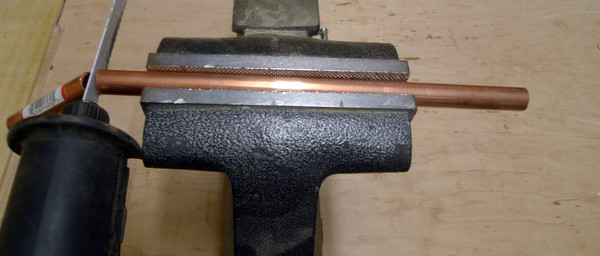
Step 15
Measure and cut the handle to length. We used a sawzall, but a hack saw or coping saw will work as well. Carefully slide the handle through the holes you drilled in step 10.

Step 16
Nail the trapezoid-shaped pieces on the outside of either end of the 6-pack holder to secure the handle in place.
Step 17
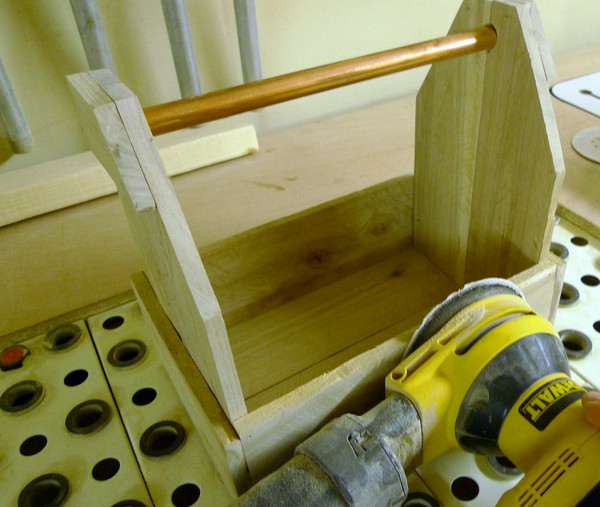
Lightly sand the entire box to your desired finish. We used 120-grit sandpaper in a random orbit sander.
Step 18
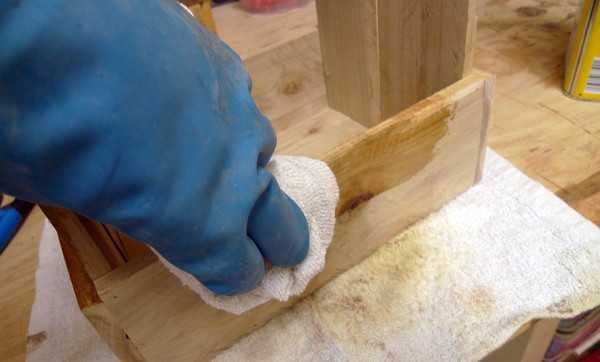
Finish. There are a lot of options in this respect, depending on the look you’re after. In our case, we were looking for a light finish which highlighted the wood’s natural character, so we used a Tung Oil finish by Minwax applied using a cotton rag. Just wipe on and let dry!
Step 19
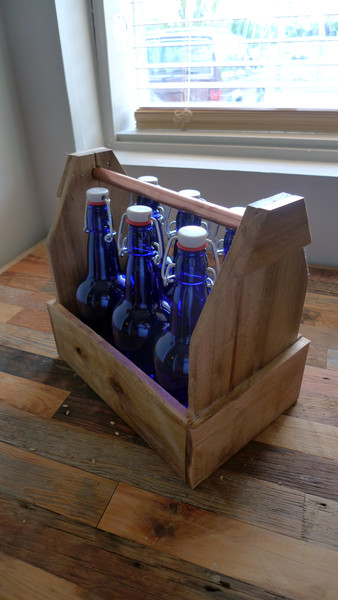
All done! After the finish has had time to dry, your dad will be ready to tote his brew in fine style. In fact, you could even put this thing in action by filling it up with his favorite beer.
If you undertake this project, we'd love to see the results. Please feel free to share them with us on Twitter, Instagram or Facebook @boxbrewkits.